
Article: How to Make Beeswax Tealights Using a Tealight Mold
How to Make Beeswax Tealights Using a Tealight Mold
Tealight candles are one of the most popular candles to make because they are simple, versatile, and perfect for everyday use. Using a tealight mold allows you to create smooth, professional-looking beeswax tealights quickly and consistently.
In this guide, we’ll walk through the process of making beeswax tealights using a pin-style tealight mold, which is the most common style used by candle makers.
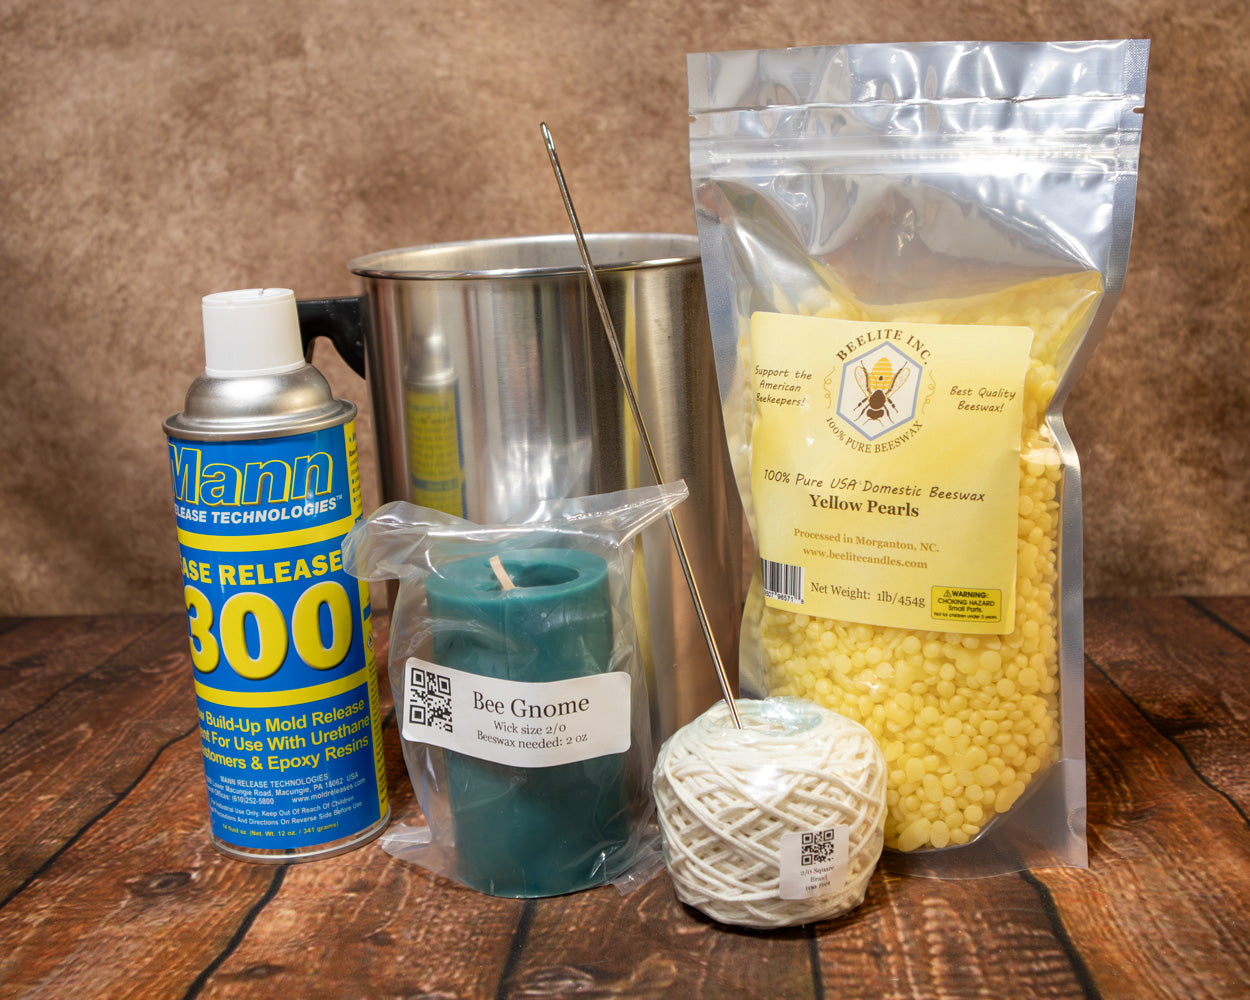
Supplies You Will Need
Before getting started, gather the following materials:
-
Beeswax (pellets, blocks, or filtered beeswax)
-
Tealight mold with metal wick pins
-
Double boiler or wax melting pot
-
Pouring pitcher
-
Thermometer
-
Tealight wick assemblies (typically #6/0 wick for standard beeswax tealights)
-
Tealight cups (plastic or aluminum – optional)
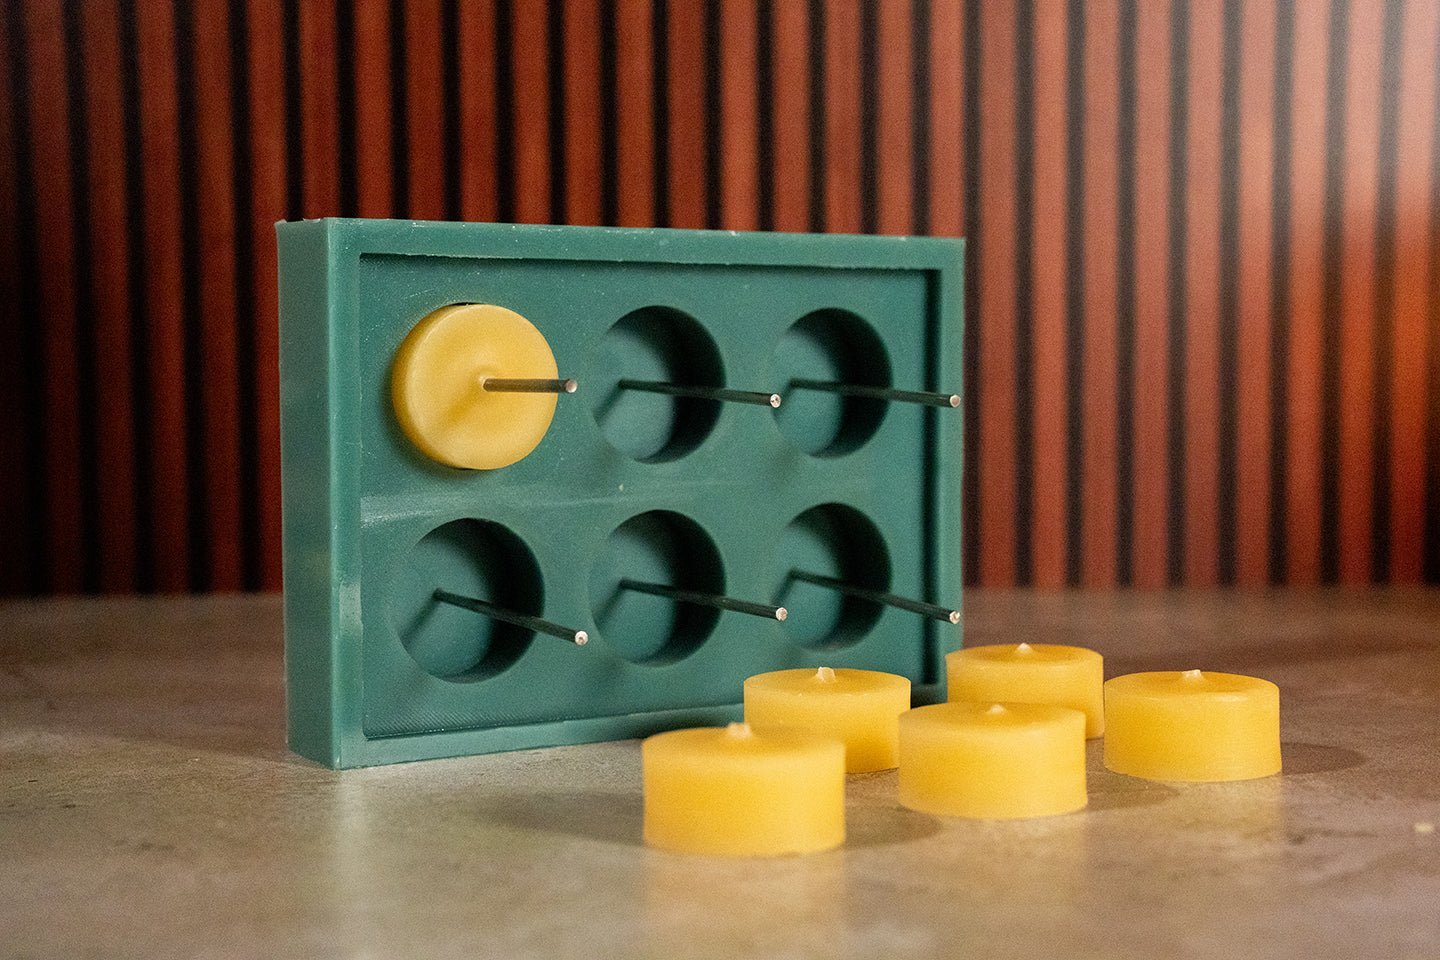
Step 1: Prepare the Mold
Pin-style tealight molds are designed to create the wick hole automatically during the pour.
Before pouring wax:
-
Insert the metal pins into the mold so they run through the center of each tealight cavity.
-
Make sure the pins are seated straight and centered.
-
Place the mold on a flat, level surface where it can remain undisturbed while cooling.
Because these molds are made from flexible urethane rubber, no rubber bands or assembly is required.
Step 2: Melt the Beeswax
Place your beeswax into a double boiler or wax melting pot and heat slowly until fully melted.
Beeswax typically melts between 145°F and 150°F.
For pouring tealights, a temperature around 170°F–175°F works well.
Avoid overheating beeswax, as high temperatures can darken the wax and affect its natural color.
Step 3: Pour the Wax
Once the wax has fully melted:
-
Slowly pour the beeswax into each tealight cavity.
-
Fill each cavity to the top.
-
Pour carefully to avoid air bubbles.
The metal pin inside the mold will create the wick hole automatically.
Step 4: Remove the Wick Pins
After pouring, allow the wax to begin cooling.
Approximately 30 minutes after pouring, gently remove the metal pins from the mold.
Removing the pins at this stage helps prevent them from becoming stuck as the wax fully hardens.
Step 5: Allow the Candles to Fully Cure
Let the tealights cool completely in the mold.
Depending on room temperature and wax temperature, full cooling may take 1–2 hours.
Avoid moving the mold during this time to keep the candle surfaces smooth.
Step 6: Remove the Tealights from the Mold
Once the candles are fully cured:
-
Turn the mold over.
-
Gently press or tap the mold to release the tealights.
Urethane rubber molds are flexible, allowing the candles to pop out easily.
Step 7: Insert the Wick
After removing the candles from the mold:
-
Insert a tealight wick assembly through the hole created by the wick pin.
-
Pull the wick through until the wick tab sits flush with the bottom of the candle.
Step 8: Add a Tealight Cup (Optional)
You can now place the finished tealight into a tealight cup.
Most candle makers use:
-
Plastic tealight cups
-
Aluminum tealight cups
The cup helps contain melted wax during burning and makes the candle safer to use.
Some people choose to burn tealights without a cup in appropriate holders.
Tips for Best Results
✔ Use #6/0 wick for most beeswax tealights
✔ Remove the wick pins about 30 minutes after pouring
✔ Allow candles to cool naturally at room temperature
✔ Always burn tealights in a proper holder
Why Make Beeswax Tealights?
Beeswax tealights are loved for their:
-
Clean, long burn
-
Natural honey aroma
-
Renewable and eco-friendly wax
-
Warm golden glow
They are perfect for home décor, gifts, weddings, and everyday ambiance.


Leave a comment
This site is protected by hCaptcha and the hCaptcha Privacy Policy and Terms of Service apply.